Archive
Where is Santa?
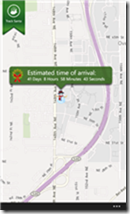
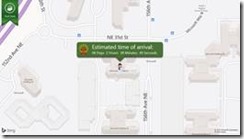
If you were nice this year (or maybe even a little naughty), Santa and his elves are preparing something just for you. But how will you know when jolly old Saint Nick leaves the north pole? And how do you know what time you need to be fast asleep? With Where is Santa for Windows Phone and Windows 8 of course!
So grab the apps and a cup of hot chocolate. Set out the cookies and watch to see when Santa is on his way to see you!
Where is Santa for Windows Phone
Office Hours
I hold weekly Office Hours on Wednesdays from 12pm to 2pm. On the 1st and 3rd Wednesdays of the month I hold them at the Microsoft store in the Galleria mall. On the 2nd and 4th Wednesdays I hold them online.
What are Office Hours?
Simple, it’s a time where I’ll be available for folks who are working on Windows 8 apps to come by and ask questions, show off apps in progress, and in general get help getting their apps in shape for publishing to the Windows Store. I’ll also will be able to help with Windows Phone 8 apps and Windows Azure questions… I just may have to do additional research before I can get you an answer.
Schedule
Please sign up for a slot via the ohours.org button above so that I can manage my time more effectively, and let me know if you’re coming to get some questions answered (and a heads-up on the questions will give me some time to do any needed homework) or just to spend some quiet time coding. Feel free to email me at jbienz [at] microsoft.com.
Incentives for App Developers
There are so many incentive programs for our developers right now that I needed a list just to keep track of them all. Below is what I have so far, thanks in large part to Jeff Blankenburg and Ryan Lowdermilk.
I’m sure we’ve missed other incredible opportunities, so if you know of anything that should be on the list please e-mail me and let me know.
Student Store Accounts (Students Only)
Students, did you know that you can get your Windows Phone and Windows 8 developer accounts for free?
Here are all the details, step-by-step:
How to get your free student Windows 8 store account
How to get your free student Windows Phone store account
Generation App
Generation App is an ongoing loyalty program for developers of Windows 8 and Windows Phone 8 store apps.
Link: bit.ly/winappsupport
Platforms: Windows 8 and Windows Phone 8
Ends: Ongoing
Phone: 1-800-895-4212
Hours: M-F 6:30 AM to 5:00 PM Pacific
Incentives:
- Up to 30 minutes with a Windows 8 design expert to review your app and provide guidance on creating a stunning user experience.
- Up to 30 minutes with a Windows 8 architect to assist with building on Windows 8.
- More incentives to be announced soon…
Windows 8 App Madness (Students Only)
![clip_image002[7] clip_image002[7]](https://jaredbienz.files.wordpress.com/2013/02/clip_image00271.jpg?w=305&h=96)
With this challenge we hope to excite and motivate thousands of students to build Windows 8 apps over the next 2 months!
Link: http://aka.ms/Windows8AppMadness
Platforms: Windows 8
Ends: 4/11/2013
Incentives:
- $100 gift card per app! (limit 5)
- Accelerator: 4 sprints during the challenge. The student who publishes the most apps during the sprint wins a trip for 2.
- Facebook poll of students will determine the trip destination. Get voting!
Ultimate Experience

Ultimate Experience has some cool prizes and it’s more like a raffle than a competition.
Link: generationapp.com/ultimateexperience
Platforms: Windows 8 and Windows Phone 8
Ends: 2/28/2013
Incentives:
- 1 App: Store account fees reimbursed and a copy of Halo 4
- 1+ Apps: Every app increases the chance of winning one of 12 XBOX consoles with Kinect
- 1+ Apps: Every app increases the chance of winning one of 3 trips to visit Microsoft Game Studios
WP Next App Star

Your chance to be on TV, win devices and more!
Link: bit.ly/wp8appstar
Platforms: Windows Phone 8
Ends: 3/5/2013
Incentives:
64 Winners Receive:
- A Nokia Lumia 920 Windows Phone
- Featured promotion in the Windows Phone Store
- Exposure via online media
- A 1-year free Dev Center subscription
Grand Prize:
- All of the above, PLUS Featured placement of your app in a Windows Phone primetime TV ad in the U.S
Nokia DVLUP

This Nokia developer loyalty program keeps the fun and prizes coming year round. This program is currently in beta and a code is required to join, so you can e-mail me and I’ll see if I can get you a beta code.
Link: dvlup.com
Platforms: Windows Phone 8
Ends: Ongoing
Incentives:
- Get credit for old phones (any make and model) toward a new Nokia
- Submit applications to challenges and win experience points
- Cash in experience points for prizes like Nokia phones, gift cards (Amazon, Starbucks, etc.), XBOX consoles and more
- New challenges and new prizes every month
Nokia Buy 1 Get 1 Free

While this is not specific to developers, Nokia is running a buy-one 920, get the second 920 for free. On AT&T, this comes out to two Nokia 920s, for $99. For people wanting to develop for Windows Phone 8, this deal might be the icing on the cake. — Thanks to Wiliam Fink for the tip!
Link: http://www.nokia.com/us-en/products/phone/lumia920/
Platforms: Windows Phone 8
Ends: 2/21/2013
Incentives:
- 2 phones for the price of one!
Social Good Contest

Windows 8 Apps for Social Good invites both new and seasoned developers to create an app for “social good”.
Link: bit.ly/win8socialgood
Platforms: Windows 8 and Windows Phone 8
Ends: 2/28/2013
Incentives:
- Best Overall Windows 8 App: $15,000 + Windows Phone
- Best Overall Windows Phone 8 App: $15,000 + Windows Phone
- People’s Choice: $10,000 + Windows Phone
Dev support, design support and more awesome goodness on the way: bit.ly/winappsupport
Resources for Game Developers
As we’re doing game development labs at colleges and universities, I wanted to share some of the awesome free resources that are available to game developers.
Icons
Metro Studio – 600 free metro style icons from the cool folks at SyncFusion.
The Noun Project – Hundreds (if not thousands) of icons for just about anything you can think of, all free. These icons will download in Scalable Vector format (SVG) and will need to be converted to PNG at the size of 48 x 48 pixels. Either InkScape or Expression Design can be used to do the conversion.
BRKR Design Icon Pack – This pack costs $20 but it includes 350 of the most commonly used icons already sized and ready to go. This single package includes all 350 icons for Windows Phone, iPhone and Android.
Images
Every Stock Photo – Search thousands of images, many of which can be used in apps and games. Click on advanced search, then click the Licenses dropdown and check ONLY the boxes for Public Domain and Custom Free. When you find the image you’re looking for, be sure to follow the search result back to the original site and read the license to make sure it can be used in your application.
Sound Effects
Soundjay – Hundreds of sound effects that are licensed for use in apps and games. Most (if not all) of these sound effects should play as-is on Windows Phone. You can use a tool like Audacity to convert any sounds that don’t play into ones that do.
Freesound – Thousands of free sound effects. Carefully check the license for each sound effect because not all sound effects can be used in commercial applications. Some sound effects may also require you to give attribution (credit) to the author in your application. Not all sound effects on this site can be played on Windows Phone. You can use a tool like Audacity to convert sounds that don’t play into ones that do.
Audio Micro has a free music and sounds tab on their home page.
Music
Incompetech – Hundreds of high quality songs available for use in apps and games. They’re even organized by genre, "feel" and keyword. Many of these songs require attribution (listing in credits) or can be purchased for royalty-free use.
FreePD – Another great resource for finding free music in the public domain. Their FAQ states that all of the songs listed are available for use without attribution. Double-check that the page shows "CC Zero" at the bottom.
Sprites
Open Clipart (.org) – Hundreds if not thousands of free images, most don’t even require attribution!
HasGraphics Sprites – 10 sprite sets free for commercial use. Some require attribution, some do not.
Video Game Sprites – Actual sprites from original games, not able to use in commercial games
Lost Garden – Game graphics, asks for acknowledgement.
Open Game Art – Graphics, sprites, icons and sounds. Asks for donations.
Textures
CGTextures – Amazing, pretty exhaustive collection of tillable textures that can be used for free in commercial games. Attribution is appreciated but not required.
HasGraphics Textures – Two large tile sets free for commercial use.
PinTools: Take Control of Virtual Pinball
A few months ago I bought a VirtuaPin digital pinball machine. I bought it as a hobby and knew it would be fun to discover new tables and create custom add-ons for the device. What I didn’t realize at the time is how much effort goes into adding a new table. Here’s what I usually have to do:
- Download the table file itself
- Download Backglass image (for HyperPin)
- Download Playfield image (for HyperPin)
- Download Playfield video (for HyperPin)
- Download Wheel image (for HyperPin)
- Download Animated backglass (for UltraVP)
- Add the table in the right HyperPin database.xml file
- Run the table to position and resize the DMD window
- Edit the table script to run UltraVP instead of PinMAME
That’s a lot of steps to go through and I found myself always forgetting one piece or another. This table’s missing the playfield image, that table’s missing the animated backglass. Repositioning the DMD turned out to be a pain too, especially after I had a bunch of tables running and decided to change resolutions. All of my DMD windows were off the screen! I had to reset all ROM settings and position them all over again.
Enter PinTools
What does it do?
In the current release PinTools can…
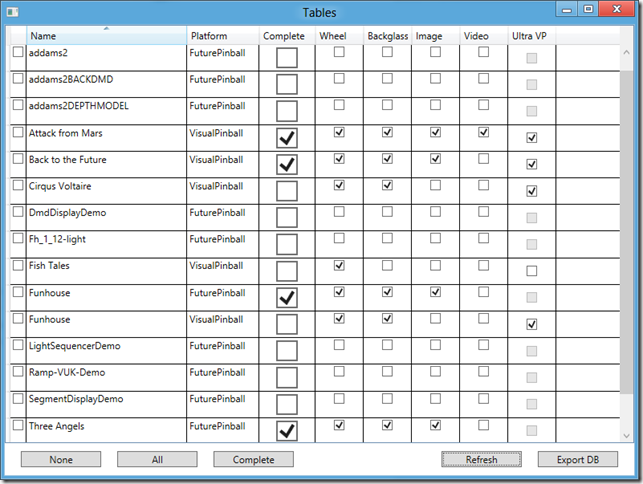
List all installed tables and show which additional files are missing
The configuration file allows you to set which folders to look in and also allows you to specify which files are required for the table to be considered “complete”. In the screenshot above, Back to the Future is considered complete even though I don’t have a table video. That’s because I’ve set table videos to be optional.
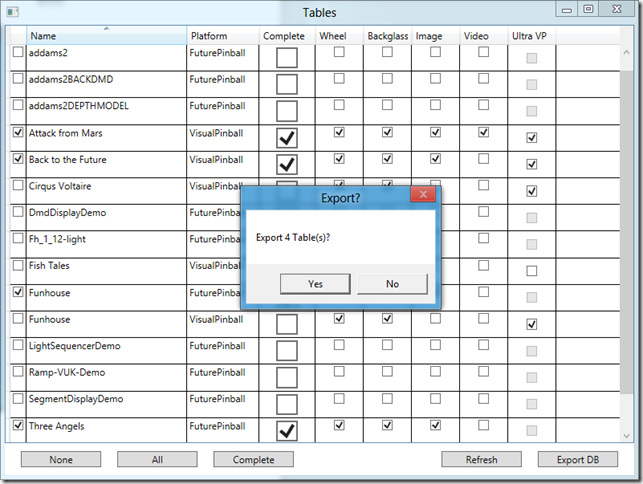
Automatically generate HyperPin database files
You can select All tables, “Complete” tables or even individual tables, then let PinTools generate HyperPin database files for you. Easily add tables in HyperPin when they’re ready to be put on display.
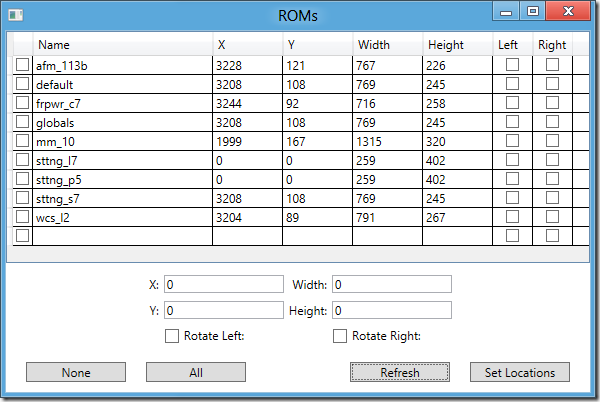
See DMD locations for all ROMs in the registry
See the DMD position size and rotation settings for every ROM at a glance.
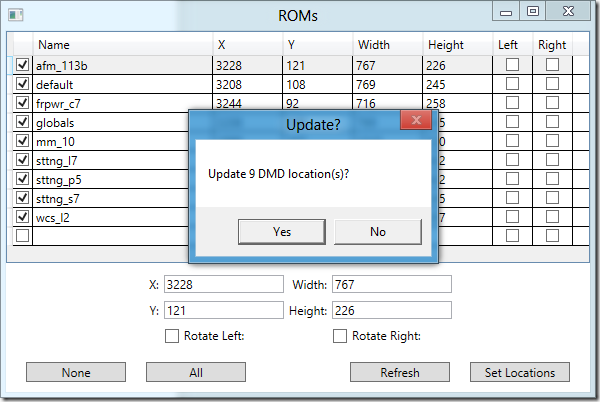
Bulk update DMD settings
Select an existing ROM to copy settings from or type in new values. Then, apply the settings across all ROMs or even individual ones.
Release Notes
This was a quick project for me (created in two afternoons) so let me set some expectations about the quality of the code:
There is no settings screen. You must edit PinTools.exe.config to change folder paths and change which files are required for a table to be considered “complete”.
If you don’t edit the config file and set the right folder paths for your system, the app may crash.
The app may also crash because it’s Tuesday, or it’s raining, or it’s just moody. There’s no warranty, back up your files, use it at your own risk, blah blah blah.
I made absolutely no attempt whatsoever to deal with threading. If you have hundreds of tables this app will appear to be locked up while it loads data and scans for files. This is absolutely horrible and unacceptable. No one should ever block the UI thread, that’s just being lazy. I was lazy. I might try to fix this at some point but for now, hey it’s free, enjoy.
Important Note: Many Full Screen (FS) tables include code in the script to rotate the DMD left or right. Look for “rol” or “ror” (including quotes) and comment these lines out. Otherwise PinTools can update the rotation settings in the registry but they’ll just get overwritten on the next run.
Download
PinTools requires .NET 4.0 (at least Client Profile). If you don’t have it, get it here.
For developers: Because I hate it when somebody makes a tool, ends up not having time to support it and won’t release the source code, here’s the source code on Git.
For most users: Download PinTools1_0.zip, unzip, edit PinTools.exe.config, run PinTools.exe.
169 Apps in 24 Hours
As a Mobile Evangelist a big part of my job is trying to figure out how to get people excited about building apps. My team and I have tried a number of strategies this year ranging from training to creating tools and even hosting our own events. Unfortunately, we just weren’t reaching the numbers we were hoping for and I had this nagging feeling we were missing something important. Over the holidays I worked with some really smart people to come up with a few ideas that resulted in 169 apps in 24 hours. This blog post is the story of how.
 Back in October I bumped into Paul DeCarlo at Houston Techfest. I had originally met Paul a year earlier when I was teaching Windows Phone development at U of H and Paul was completing his masters. In the time that followed, Paul actually started his own side business selling applications in the Windows Phone marketplace and business was good. I had an idea that I wanted to do something with students, but I didn’t quite know what. While we were talking at Techfest I found out that Paul was the Microsoft Campus Rep, Asus Campus Rep and Rockstar Campus Rep all at the same time while he was at U of H. He told me about these crazy LAN parties where they would bring in Rockstar and bands and stay up all night. I knew there was an idea there, but I didn’t know what it was.
 Fast forward to December and Paul was reaching out to me because he had a friend he wanted to nominate as the new Microsoft Rep at U of H. That friend was Rick Gentry and I was able to help get Rick nominated and hired in that same month. About that time I was talking with Deanna Robison about our marketing budget and about trying to excite students. We kicked around the idea of buying a bunch of $10 Amazon cards as a way to entice students to build their first app. She also knew we were getting a bunch of phones. We didn’t know how many but we liked the idea of giving students a phone for every three apps they got into marketplace.
On a Tuesday night in early February, Paul and Rick and I all got together at a small Vietnamese place on Bellaire. I got Microsoft to pay for the meal and the three of us brainstormed for several hours about how we could do something big at U of H. We knew we wanted apps and we knew we wanted to include as many people as possible. Going on the assumption of cards and phones, we identified three different “groups” of students that might attend our event. The first group were Sr. CS students who had development experience and just wanted the challenge. The second group were actually business students who didn’t have strong development skills but were interested in being able to say they had put an app in the marketplace. The third group were Jr. CS students that were somewhere in between. Meaning they had some development experience but were new to coding and maybe hadn’t seen .NET before.
 For each group of students we tried to identify what we could do to make that group a success. For the Sr. students we thought it’d just be best for me to sit with them and answer all their questions. Easy enough. For the business students we thought it would be great to teach them AppMaker. We knew we needed something different for the Jr. developers, but what? Something that could take a little experience and turn it into a lot. Then I remembered the awesome starter kits people like Chris Koening and Danilo Diaz had been creating and I put together a Resources for New Phone Developers blog post that ended up getting used at BAOC and other student events. One starter kit in particular really stood out to us, and that starter kit was the Social Viewer template by Nick Randolph. Paul had recently started the basics of his Just a Fan apps on the Social Viewer template and Social Viewer had far more functionality than AppMakr ever would. More importantly, we had access to the Social Viewer Source. We knew we wanted to leverage it but we didn’t know how.
January ended up being a busy month. I reached out to Nick Randolph with the idea of creating a UI configuration tool for his Social Viewer template. The idea was to make Social Viewer as easy as AppMakr. Nick was very supportive and gave me access to everything I needed. But then things started to fall apart when I found out that our Windows Phone hackathon was going to be competing for students against an Android hackathon scheduled at the same time. We decided it would be best to either lead the Android event or follow it so that we weren’t competing. But the Android event was scheduled for the third week of February and pushing ours out into March would be too late. It would have to be in early February, and to make matters worse, new rules were coming down that required the use of dev tools at our events (meaning AppMakr would not be allowed). We did manage to get an exception for AppMakr since the event was already scheduled, but we knew we needed a strategy that would be successful without it going forward.
On January 26th, Paul, Rick and I stood in front of a room full of Cougar CS students at U of H. Paul gave a presentation on the amount of money he’d made creating apps for Windows Phone and we talked about why having a smaller marketplace is actually better for developers. 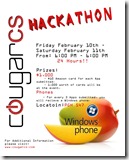 We closed by announcing the Windows Phone hackathon and, thanks to Deanna, $1,000.00 worth of Amazon cards and 10 phones. We knew we could get more phones and cards, so we hinted that there would be something going on past the event too. All of the students seemed interested and even suggested we plan it for a full 24 hours. The three of us went home excited that night. Rick created a flyer and I started work on a super secret project.
Two weeks later AppFactory was born and I let Paul know what I’d been working on.
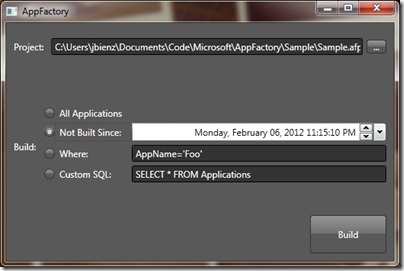
AppFactory is, for all intents and purposes, a glorified MSBuild script with a pretty front-end. It’s purpose in life is to take template projects (or starter kits) and turn them into factories of applications. Paul had actually a simplified version of AppFactory for his Top Music Videos and “Just a Fan” suite of applications. Paul wasn’t alone. Anyone who’s built a company based on multiple applications on a similar codebase knows this problem. You start from a template, add custom logic, bring in your data, sprinkle in artwork, reconfigure services, build the solution, rinse and repeat. This problem has been solved before, but it’s always been solved uniquely for one project and never shared for others to use. And that, specifically, is what I wanted to fix with AppFactory. I think Paul was a little surprised and shocked to see AppFactory, but he realized right away what it meant for him. It meant he could get out of managing his build process and focus specifically on the part he cared about – his IP. In less than 24 hours Paul had completely replaced his custom build process with AppFactory. 24 hours after that he had used AppFactory to rebuild all 300 Just a Fan Applications. AppFactory would come back later to help with our event.
On February 10th, Paul Rick and I met for dinner on the U of H campus just before our hackathon. We had Asian food, as seems to be our tradition, and we talked about how we thought the night would go. I personally expected about 25 students and I expected to lose half of them before the night was over. We knew we’d start with Rick giving a presentation on AppMakr and follow it up with Paul giving an overview of the Social Viewer template. In a last minute stroke of genius we thought it would be cool for Paul to use a football team as the subject for his Social Viewer talk. Then, if we had time later, I could do a walkthrough of converting that to a suite of applications using AppFactory. We didn’t discuss the number of apps we thought we’d end up with, but I remember thinking I’d be happy to get 30 or 40 by the time we were done.
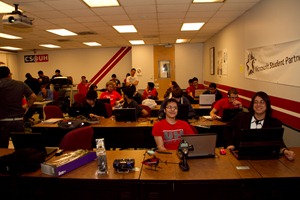
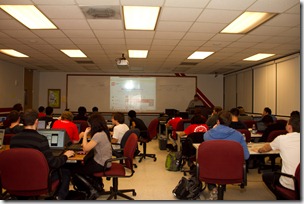
At 6:00 PM we walked into a computer lab packed wall-to-wall with students.
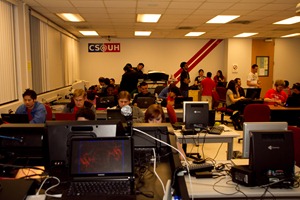
There were more than 50 people waiting to get started, and there were so many unexpected attendees that we had to overflow some of them into the next room.
Because we had so many people that had never done Windows Phone or .NET before, I started with a 20 minute overview of Visual Studio and Expression Blend. After running to the gas station to get us some ice, Rick followed up with his presentation on AppMakr. Not long after that Paul did his presentation on Social Viewer. It was awesome.
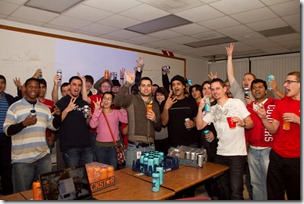
Rick, being the Rockstar promoter, got everyone hopped up on caffeine and within three hours we’d already given away our first phone.
The second phone went about 30 minutes later and the pace just kept up like that the rest of the night.
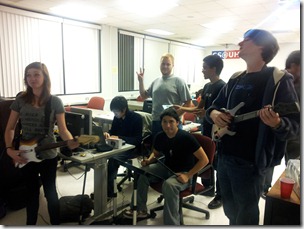
I knew a 24 hour event would be tough, even for college students hopped up on Caffeine. Luckily I had thought of that ahead of time and my awesome boss Nathan approved budget for food and for an XBOX. I brought my own copy of Rock Band and I also brought my own personal RC helicopters and RC trucks to drive around. Together with some loud music between Rock Band sessions, these distractions proved to be just enough to keep everyone going all night long. Though we did still lose probably 50% of the attendees at night, keeping 25 college students interested in anything for 24 hours is no small feat. 🙂 Here’s a photo of us playing Rock Band at 4:00 AM.
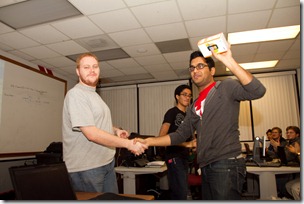
About an hour after that picture was taken I was given a special surprise. Paul had been taking notes when he gave his Social Viewer presentation and he noticed a team of four guys were really paying attention. Entirely on his own, and without me knowing it, Paul sat down with that team and walked them through using AppFactory to take his football sample and turn it into a suite of 32 applications for the NFL. Those guys showed up with very little programming experience and left with $320, a phone for each of them and the start of a new business. It doesn’t get any better than that.
When 6:00 PM rolled around on Saturday I was surprised at how lively everyone was; even me. I felt like I could have stayed a few more hours (and part of me really wanted to since apps were still getting submitted at a regular rate) but luckily I had just kicked of AppTastic with U of H allowing students to continue submitting apps even after the event was over.
When I finally sat down and really looked at the spreadsheet I couldn’t believe my eyes. I checked and double-checked to make sure there wasn’t a copy-and-paste mistake. Did we really make 169 apps in 24 hours? We did. Not only that but I had created a column called ‘Is AppMaker’ to keep an eye on how we were doing with custom dev. Out of 169 apps, 104 were custom code. That means that only 38% of the applications were AppMakr. Many of the students started with AppMakr to get something done quickly and then moved on to custom code. Lots of the AppMakr apps were quality work too, like the Recipes app and Adventure Time.
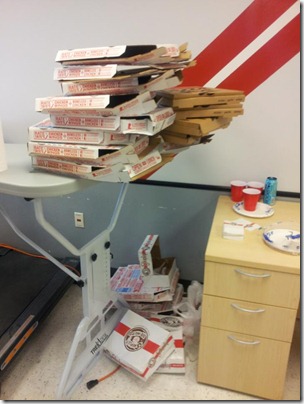
All in all we consumed more than $300 worth of pizza, 36 kolaches, a dozen doughnuts, 2 crates of Rockstar and 12 liters of softdrink. We gave away $1,500.00 worth of Amazon gift cards and I still owe $180 more. We gave away 10 phones and I still owe 31! This has been one helluva learning experience, and I hope I get to do it again.
Facebook Event Page – Lots of great commentary, especially the oldest pages.
Photos of the Event – Photos shown in this article and many more.
App Photos – Photos of 48 custom applications written at the event.











Courting Pinterest on WP7
The amazing Sara Summers (@ssummers) asked Pinterest on a date with an adorable and witty little online love letter. I love it! Who else wants to see Pinterest on Windows Phone? I know I sure would.
MIDI Drum Perfection in Rock Band
First, a Little Background
Let me start by saying I’m neither a professional drum player or a professional Rock Band player, but for some reason I find myself strangely obsessed with getting pro drums working perfectly in Rock Band.
About a year ago I took it upon myself to tear apart a Guitar Hero drum set and turn it into a wireless controller for my Roland TD-4. It worked fairly well, but I’ve always been plagued with random double-hits or random misses and, well, I was obsessed. So when I read about the MIDI-Pro Adapter I got pretty excited and decided it was time to fix my problems once and for all.
I started by reading the manuals for the MIDI Pro adapter and the TD-4. Then I sat down and played with all the settings to understand how they impacted game play and achieve the ‘perfect’ settings.
In the end, the MIDI-Pro adapter made such a noticeable difference that I really only needed to change a few settings from the TD-4s factory defaults to get the performance I wanted. Still, your drum set could be quite different from mine and these settings may need to be changed over time. Though I did all my research using the Roland TD-4, these settings should affect gameplay similarly on any other drum set that has them.
Reference Materials
All of this information was compiled using the resources listed below. If you have time you can learn a lot more about each setting by reading these manuals. This is especially true of the TD-4 manual because your drum set could be different from mine. Your pads may be more or less sensitive, your pads may be mounted closer or further away from each other, your carpet may absorb more vibrations, etc.
FAQ for the Rock Band MIDI Adapter
http://rockbandsupport.madcatz.com/KB/c9/midi-adapter.aspx
Manual for the MIDI Adapter
http://www.madcatz.com/UsersGuides/RockBand/RB3_98071_MUG.pdf
Manual for the Roland TD-4 Drum Brain
http://www.roland.com/products/en/_support/om.cfm?PRODUCT=TD%2D4&iRcId=1810687&dsp=1
MadCatz MIDI Pro Adapter
There’s really nothing you need to configure on the MIDI Pro adapter other than making sure the switch is set to ‘D’ (Drums). I personally have the Cross-Talk wheel set to about 80% sensitive, but you’ll find your sweet spot after a few minutes of playing.
TD-4 MIDI Mapping
The first thing you’ll want to do is setup the proper MIDI mapping in the TD-4 brain. Though the MIDI Pro adapter does support several MIDI numbers for the same color I just felt like it did a better job of ignoring double hits when the same number was used across pads (this isn’t something I could prove though).
The TD-4 allows you to setup multiple ‘kits’ and each kit can have it’s own MIDI map. I used this feature to create two different kits for use in Rock Band and I’ll describe each of those kits below.
Notes from the MIDI Pro Adapter Manual
The table below is included for reference. It’s taken straight out of the MIDI Pro Adapter manual and it shows the MIDI numbers that are supported for each pad. BOLD numbers are the primary numbers but subsequent numbers can be used as well.
|
MIDI Number |
Trigger Type |
In-Game Action |
|
38, 31, 34, 37, 39, 40 |
Snare |
Red Pad |
|
48, 50 |
Hi-tom |
Yellow Pad |
|
45, 47 |
Low-tom |
Blue Pad |
|
41, 43 |
Floor-tom |
Green Pad |
|
22, 26, 42, 46, 54 |
Hi-Hat Cymbal |
Yellow Cymbal |
|
51, 53, 56, 59 |
Ride Cymbal |
Blue Cymbal |
|
49, 52, 55, 57 |
Crash Cymbal |
Green Cymbal |
|
33, 35, 36 |
Kick Pedal |
Kick Pedal |
|
44 |
Hi-Hat Pedal |
Hi-Hat Pedal |
|
CC#4 (Foot controller) |
Hi-Hat Pedal Position |
Allows Hi-Hat pedal to be held closed |
MIDI Mapping for Game Play
Below are the MIDI settings I chose for playing Rock Band in "regular" mode (Main Menu -> Play Now or Career).
I started on the TD-4 by copying the Vintage kit (Kit 6) to Kit 24 (Menu -> 5 Kit Copy -> Source: 6 Vintage -> Dest: 24). Then I renamed kit 24 "RB Game" (Menu -> 4 Kit Name). In case you’re wondering I chose the Vintage kit, I chose it because I liked the way it sounded. 🙂
Next I used the MIDI settings on the TD4 drum brain (Menu -> 6 MIDI) to remap the MIDI numbers on pads as necessary. Just strike any pad, then use the dial to change the note.
In the table below, bold numbers indicate the settings I chose and numbers in [brackets] indicate each pads original setting. These mappings really do depend on how your set is physically laid out and they’re also a matter of taste. My set is laid out almost identical to how it’s shown in the TD4 setup manual and I’ll explain why I set pads a certain way after the table.
|
TD4 Pad |
MIDI Number |
In-Game Action |
|
HH BOW (HH) |
22 [46] |
Yellow Cymbal |
|
HH EDGE (HH) |
22 [26] |
Yellow Cymbal |
|
CRASH 1 (CR1) BOW |
22 [49] |
Yellow Cymbal |
|
CRASH 1 (CR1) EDGE |
22 [55] |
Yellow Cymbal |
|
SNARE (SNR) HEAD |
38 [38] |
Red Pad |
|
SNARE (SNR) RIM |
38 [40] |
Red Pad |
|
TOM 1 (T1) |
45 [48] |
Yellow Pad |
|
TOM 2 (T2) |
45 [48] |
Blue Pad |
|
RIDE (RD) BOW |
49 [51] |
Green Cymbal |
|
RIDE (RD) EDGE |
49 [59] |
Green Cymbal |
|
TOM 3 (T3) |
41 [41] |
Green Pad |
|
KICK |
33 [36] |
Kick Pedal |
It’s worth noting here that I couldn’t find a way to program the MIDI number for the HH PEDAL (HHC input). Whenever I tapped on the HH PEDAL I would see the same thing on the display as striking the HH BOW (HH). And whenever I tried to change the MIDI number it was changing the HH BOW MIDI number instead of the PEDAL. I don’t know if I need a firmware update because the TD4 brain is definitely sending a different MIDI number for the HH PEDAL than it is for HH BOW. I know this because in the game it plays a KICK for the PEDAL and Yellow (hi-hat) for the BOW.
I personally chose to map HI-HAT (HH), TOM 1 (T1) and CRASH 1 (CR1) to Yellow. I did this because the hi-hat is pretty far to the left of the snare but in the game Yellow is on the right of Red. This was really confusing to me at first and it was also confusing for my friends. By making my left cymbal another option for Yellow an swiveling my snare just a little to the left it became a lot easier for us to move from the Rock Band drum set to the Roland. Now, sometimes I play the hi-hat and sometimes I play the crash. It just depends on what feels natural to the song. I’ve also had the most cross-talk problems with the hi-hat, so being able to play the crash instead has helped my score on a few tracks.
I also chose to map both TOM 1 (T1) and TOM 2 (T2) to Blue in game play mode. I did this because it just felt right in drum fills.
Finally, I mapped the RIDE (RD) cymbal on the right to Green instead of Blue. I did this because I found there were a lot of songs where I felt like Green notes should be played on a cymbal and not on a pad. Of course this means I have Yellow and Green cymbals but no Blue cymbal. If I was going to try to get a Blue cymbal into my system I’d probably do it by changing CRASH 1 (CR1) to Blue (51) instead of changing the RIDE (RD) cymbal. Honestly I find myself wanting to play Green notes on a cymbal all the time and rarely (if ever) wanting to play a Blue note on a cymbal.
As I said, these mappings are a matter of taste. Your settings may vary.
MIDI Mapping for Free Play
Below are the settings I chose for playing Rock Band in freestyle mode (Main Menu -> Training -> Drum Freestyle). I started by copying the "RB Game" kit I created above (Kit 24) to Kit 25 and renaming it "RB Free". Then I used the MIDI settings (Menu -> 6 MIDI) to remap a few pads. Explanation is below the table.
|
TD4 Pad |
MIDI Number |
In-Game Action |
|
HH BOW (HH) |
22 [46] |
Yellow Cymbal |
|
HH EDGE (HH) |
22 [26] |
Yellow Cymbal |
|
CRASH 1 (CR1) BOW |
51 [49] |
Blue Cymbal |
|
CRASH 1 (CR1) EDGE |
51 [55] |
Blue Cymbal |
|
SNARE (SNR) HEAD |
38 [38] |
Red Pad |
|
SNARE (SNR) RIM |
38 [40] |
Red Pad |
|
TOM 1 (T1) |
48 [48] |
Yellow Pad |
|
TOM 2 (T2) |
45 [48] |
Blue Pad |
|
RIDE (RD) BOW |
49 [51] |
Green Cymbal |
|
RIDE (RD) EDGE |
49 [59] |
Green Cymbal |
|
TOM 3 (T3) |
41 [41] |
Green Pad |
|
KICK |
33 [36] |
Kick Pedal |
The main differences between the "Game" kit and the "Free" kit are that I turned CRASH 1 into a Blue cymbal and TOM 1 into a Yellow pad. These changes add two sounds back into freestyle mode that would be missing from the other configuration.
Xstick and Close Numbers
The TD4 brain sends additional MIDI numbers when you do a Xstick hit on the snare or when you strike the Hi-Hat with the pedal pressed. These notes are referred to as Xstick and ‘CLOSE’ notes. There is no way to change these numbers individually on the TD-4, but they do change when you set the regular (OPEN) numbers.
I have not had a problem with these numbers affecting game play other than the fact that I can’t play a HH (Yellow) note with the HH PEDAL pressed. Because of that, I normally play with the HH PEDAL moved away or unplugged. I’m including these numbers for reference in case you want to play with them.
Xstick = SNARE – 3
HH BOW CLOSE = HH BOW – 4
HH EDGE CLOSE = HH EDGE – 4
HH FOOT CLOSE = HH BOW OPEN – 2
Clean Signals and Cross-Talk
As I mentioned above, most of my cross-talk issues went away when I switched to the MIDI Pro adapter and set all of the Yellow pads to the same number. As I also mentioned above, I have the sensitivity set to about 80% of max on the MIDI Pro adapter.
Below are the settings you may want to adjust if you are having problems with one or more pads. I’ve done my best to document what the settings mean and how the affect (or don’t affect) gameplay.
Pad Settings
Before you change any other settings it’s incredibly important to make sure the brain is configured correctly for your pads. Go into Menu -> Pad Settings then strike any pad. Look at the screen and make sure that the pad type (PD-8 for example) matches the pad your using. If you don’t know which pads you have, the model number is usually printed or embossed on the bottom. Making sure that the brain pad settings match the actual pads is critical in making sure all other settings do what they’re supposed to do.
Below are the main pad settings. Although some of them affect gameplay they do not give you the finer level of control that the advanced pad settings do.
|
Name |
What it does |
Effect |
|
Sensitivity |
Adjusts how hard or soft a pad can be struck to create louder or quieter sounds. |
Could affect gameplay if set too high or too low. During regular gameplay, Rock Band doesn’t care how hard you hit the pad it only cares that you hit it. If this setting is too high, vibrations from other pads or even from your speakers may trigger false hits. If this setting is too low, you may have to strike the pad quite forcefully in order to register a hit. This setting is a matter of preference, but the approach I took was to set it just high enough to get the white square on the display when I struck the pad the hardest I would in regular gameplay. |
|
HH Pedal Sens |
Adjusts how hard you must strike the high hat pedal to create a louder "splash" sound. |
Could affect gameplay if you have mapped the high hat pedal to a MIDI note. A higher number will cause the high hat to trigger with less force on the pedal and could also possible cause false hits if you bounce your foot on the high hat pedal. |
|
Xstick Adjust |
Adjusts the velocity at which the brain will switch from playing a Cross Stick sound to playing a Rim Shot sound on the snare. |
Should not affect gameplay. Only affects the sounds heard from the drum brain. Higher values will cause the cross stick sound even for harder strikes. |
|
Crash 2 Usage |
Determines how the CR2 trigger input will be used. |
Could affect gameplay if you have added a second crash cymbal (CY-8) or a multi-function crash cymbal (CY-12R/C or CY-15R) to your set. If you have a second crash this should be set to "CRASH 2" and if you have a multi-function cymbal this should be set to "RIDE BELL". Be aware that with ride bell turned on there will be an area of the cymbal that triggers separately from the rest (the bell area). You will need to assign a MIDI number to this area or avoid striking it during gameplay. |
Advanced Pad Settings
Below are the advanced settings that can be changed for each individual pad. These can help you fine tune issues with cross-talk, bounce and false firing.
|
Name |
What it does |
Effect |
|
Threshold |
Does not trigger a note until a certain velocity is detected on the pad. |
Will affect gameplay. The higher the number the harder you must strike the pad and the less likely the pad will fire from cross-talk. The Sensitivity setting (mentioned above) adjusts the "full range" that is measured between hard and soft strikes. Threshold essentially says "ignore anything softer than x". |
|
Advanced Curve |
Changes how volume increases or decreases in relation to velocity. |
Should not affect gameplay. Only affects the sounds heard from the drum brain. |
|
Scan Time |
Changes how the unit detects changes in velocity. Can be used to fix issues where identical hits produce louder or quieter sounds. |
Unlikely to affect gameplay but could potentially be used to correct ‘missed’ hits without adjusting overall sensitivity. A higher number will result in a more accurately tracked pad but will also cause the brain to "think longer" before a sound is produced. The lower the number the lower the latency, so set this setting low if you are not dealing with this problem. |
|
Retrig Cancel |
Attempts to ignore false triggers that come from pad resonance. |
Could affect gameplay, especially if you are using acoustic pads instead of rubber pads. This setting may help if the same pad sometimes triggers twice even though you only hit it once. |
|
Mask Time |
Completely ignores any additional trigger of the same pad for x number of milliseconds. |
Will affect gameplay. This setting can be especially helpful for the bass kick if your kick head tends to bounce. For Easy, Normal and Hard game levels you can probably set this number pretty high. As you progress toward expert, however, you may need to start turning this down since you may start striking the pads fast enough that they start getting ignored. |
|
Xtalk Cancel |
Reduces the chance that vibrations from striking one pad will be counted as a strike on another pad. |
Will affect gameplay. Be sure to raise this setting on the pad that is registering the false hit, not the one you are striking. You can set this value fairly high, but if you set it too high only the pad that’s hit the hardest will count if two pads are hit at the same time. This will be less noticeable on colors you don’t strike together often (Blue + Green) but will be very noticeable on colors you strike together often (Red + Yellow). |
|
Rim Gain |
Adjusts the amount of force required to achieve louder sounds from the RIM of the SNARE or the EDGE of the cymbals. |
Could affect gameplay if set to weak or too strong. May result in double-hits or false misses if you accidentally strike the BOW instead of the EDGE. This setting is again a matter of preference, but the approach I took was similar to sensitivity. I set it just high enough that I could get the white square on the display when I struck the EDGE forcefully. |
|
Rim Adjust |
Can be used to fix issues where the RIM (or EDGE) is triggered when you meant to hit the HEAD (or BOW). |
Could affect gameplay, especially if you chose not to map the RIM (or EDGE) to a MIDI note. The smaller the number means the less likely the RIM (or EDGE) will trigger. |
Other Settings
|
Name |
What it does |
Recommendation |
|
ProgramChg |
Sends a MIDI message when changing drum kits |
Shouldn’t affect gameplay, but the MIDI Pro Adapter may not be expecting it. I set mine to OFF just to be safe. |
Summary
Well that’s it. I hope these settings help you fine tune your own pro set to work with Rock Band. If you find anything else cool (like how to set the MIDI number for the HH PEDAL) please let me know. Other than that, ROCK ON my friends!
Windows Phone Gaming Camp
This year I introduced hundreds of college students to Windows Phone through a 1-day game development course I created and delivered. I wanted to share the materials I for that course so students, professors, user groups – really anyone – could download and learn at their own pace.
I’ve created a page for the course here: http://bit.ly/WinPhoneGamingCamp
Houston, We’ve Got a Problem
Last Thursday I had the opportunity to take a special private tour with Frank Hughes who also worked at NASA for over 20 years.
I’m too young to have my own memories of Apollo 13, but I was awed and inspired by the Hollywood retelling of it. Here’s an original picture of Eugene F. Kranz, flight director, at his console in the Gemini era. Kranz was also one of the flight directors for Apollo 13 and was played by Ed Harris in the movie.

And here’s me:
Any guess where I’m sitting? No, that isn’t a reconstruction or something created after the fact. That’s the actual room and the actual equipment used for the Apollo 13 flight!
I stood close enough to a flag that’s been to the moon to touch it (I didn’t dare) and I walked right up to a massive five story high vacuum chamber that’s used to test parachutes in extremely thin atmospheres.
And finally, I got to stand at the front of a new control center. One that’s actually in use today for the International Space Station. Here’s a shot of it from the viewing room. This is the off shift while all the astronauts are sleeping and I got to be in the room toward the front near the flag.
It was a special afternoon that I won’t forget. Thanks Frank for the memorable opportunity.

